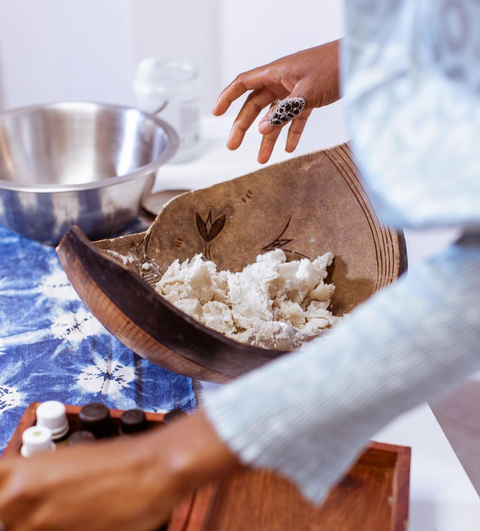
Raw shea butter is one of our favourite ultimate beauty secrets. All it takes is some simple, DIY time to bring this nourishing ingredient straight from the Earth, to meeting all your self-care needs.
If you’ve had the chance to enjoy our Ivory or Gold Raw Shea Butters – then you’ll already know that this ingredient can help with all aspects of beauty.
Its benefits have been clear and dear to generations of West Africans and, more recently, skincare lovers across the world. Raw shea butter is:
- A powerful moisturiser and sun protectant, for bare face days or makeup days
- A soothing treatment for delicate and sensitive skin, especially for lipcare or baby care
- A relaxing aid for traditional massage
- And a nourishing, restorative treatment for the hair
*Read up on the full benefits here
But maybe it’s not always clear exactly how to incorporate it into a natural beauty routine. Here are 4 simple DIY recipes for enjoying the full benefits of raw shea butter as a lip stain, solid perfume, hair treatment or heel balm.
A Quick Note on Equipment and Substitutes
A couple of these recipes call for using DIY beauty staples like wax, essential oils and carrier oils. Before you get started, it might be helpful to learn about wax options, including cruelty-free alternatives to beeswax.
Understanding the basics of essential oils versus carrier oils is also a ‘must’, as well as understanding which oils work well with your skin or hair types and any skin sensitivities.
Recipes that call for melting down raw shea butter may also recommend using a double boiler. So, for those of us who are minimalists in the kitchen too, here’s a quick guide on how to make simple substitutes.
Recipe 1: Shea Butter Lip Stain
For summer protection with a pop of colour, and a great chance to upcycle
Ingredients for a small, 50g tin of lip stain
- 1 tsp raw shea butter
- 1 tsp carrier oil (like castor, coconut or almond oil)
- 1 tsp beet root powder
- *optional: 1 pinch turmeric or cocoa powder, to tone down the hot pink colour
Equipment
- measuring spoons
- small measuring cup
- saucepan
- a small mint tin
Instructions
- Set a small saucepan of water to simmer
- Put the shea butter and carrier oil into your measuring cup, and put the cup in the simmering water until the shea butter melts
- Remove the cup from the saucepan
- Stir in the beet powder till it fully dissolves
- (Optional) stir in the turmeric or cocoa powder till it fully dissolves
- Pour mixture into your tin and allow it to cool
- Store in a dark area, away from heat, for up to 6 months
- Enjoy!
*This recipe is based on Hello Glow’s Beet Lip + Cheek Stain
Recipe 2: Solid Shea Butter Perfume
For a gentle touch of fragrance and a great chance to upcycle
Ingredients for a small tin or 2-3 lip balm tubes of solid perfume
- 1 ½ tsp raw shea butter
- 1 tsp unscented carrier oil (like grapeseed, jojoba or sweet almond oil)
- 1 tsp wax pellets
- 35-40 drops essential oil (or 2-6 oils for a custom scent, *check out this guide if you need help blending)
Equipment
- a double boiler or a pot-and-bowl substitute
- a small tin, like an empty mint container –OR– 2-3 empty lip balm containers
Instructions
- Set up your double boiler or substitute
- In the outer/bottom pot, add a small amount of water and set heat to medium
- Place the carrier oil and wax in the inner bowl/pot, and allow both to fully melt
- Remove the inner bowl/pot from the heat, and stir
- Let cool for about 1-2 minutes
- Add your essential oil(s). *Don’t worry if their scent is a bit faint at first. The scent of solid perfumes intensifies over time
- Pour the mixture into your container(s) of choice and let it cool till completely hardened
- Store in a dark, cool place for 6-12 months max, depending on the carrier oil (grapeseed: 6 months, sweet almond or jojoba oil: 12 months)
-
Enjoy!
*This recipe is based on Live Simply’s solid perfume recipe
Recipe 3: Shea Butter Hair Treatment
For replenishing moisture after a day in the sun, for all curl patterns with medium-to-coarse strands
Ingredients for 1 container of whipped mask treatment
- 50 g raw shea butter
- 1 tbsp coconut oil
- *optional: 1 tbsp jojoba or avocado oil
- *optional: 20 drops, 1 essential oil of your choice
Equipment
- a double boiler or a pot-and-bowl substitute
- scale
- mixer
- measuring spoons
- a large container for storage (whipping shea butter causes a volume increase by 2-3x)
Instructions
- Measure out your shea butter
- Set up your double boiler (or substitute)
- In the outer/bottom pot, bring a small amount of water to a boil and remove from heat
- Place the shea butter in the inner pot or bowl (it will melt very quickly, even off the heat)
- Remove the inner bowl or pot from the outer pot
- Add your coconut oil and (optional) carrier oil, mix well by hand
- Switch to the mixer. Set it to medium-to-fast speed for about 20 minutes
- You know you’re done when the mixture is light, fluffy and thick
- Transfer to a sustainable container (glass is best)
- Store in a cool, dark place for about 6 months to 1 year. The fridge isn’t recommended, as this may cause whips to turn grainy
*This recipe is based on a shea whip recipe by Robin Groover, Atlanta-based owner of Groovy Salon and an African Pride brand educator
Recipe 4: Shea Butter Heel Balm
For extra healing from a day out in sandals, and a great upcycling opportunity
Ingredients for 2 tubes of healing balm
- 50 g raw shea butter
- 50 g wax Pellets of your choice
- 4 tbsp carrier oil of your choice (like grapeseed or almond oil)
- 10 drops, vitamin E oil
- *optional: 20 drops each, 1-2 essential oils of your choice
Equipment
- 2 x empty, 62.4 g push deodorant tubes
- kitchen scale
- saucepan
- measuring spoons
Instructions
- Set the empty saucepan on a scale, tare to zero and set measurements to grams
- Add the following ingredients separately in this order, so it’s easier to measure out:
- Shea butter
- Wax pellets
- Carrier oil
- Vitamin E
- Move the pan to your stove, and melt all ingredients over low heat
- Remove from the heat and add your chosen essential oils
- Carefully pour a bit of balm in each tube (about 0.5 cm up the tube), and let it cool
- Repeat this 3 to 4 times, letting them cool in between each pour. This creates a barrier that stops the balm from leaking out the tube
- Once your base has cooled and solidified, pour the remaining balm in the tubes and let them cool for about 30 to 40 minutes
- Enjoy!
*This recipe is based on Nourish + Nestle’s heel balm


Comments (0)
There are no comments for this article. Be the first one to leave a message!